Using the Wait action in the Workflow Builder allows you to hold Contacts before advancing to the next step of a Workflow. This can be useful for many reasons, from appointment bookings/reminders to follow-ups and more. Now, let’s take a look at how to set up a Wait event.
Step 1: Adding an Action to the Workflow
- Click into the Workflow and click the + icon to add an action
- Choose the Wait action from the list
Step 2: Under “Wait For” choose the type of Wait action you wish to use
There are several options for customizing the Wait action, categorized as Time-based or CRM events. Here’s a brief description of each type of Wait action you can setup:
- Time delay: waits for a set amount of time
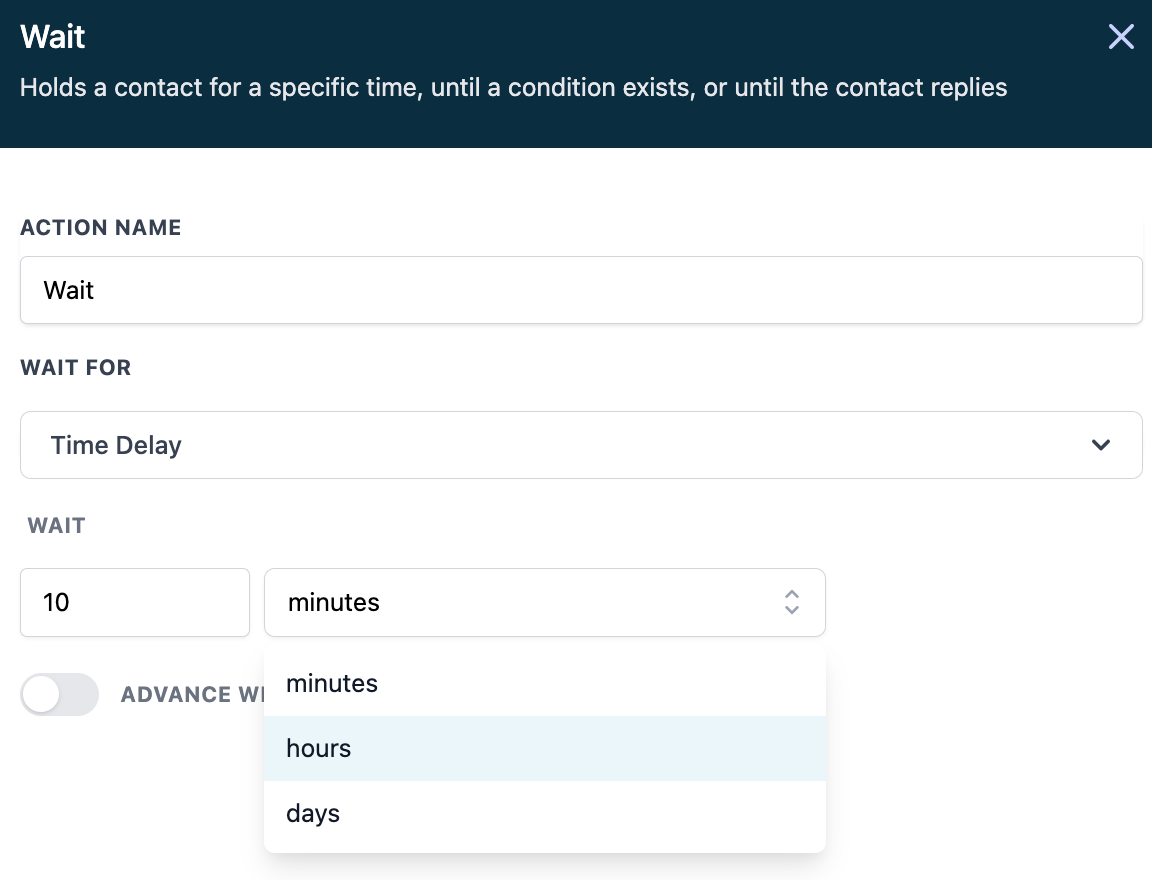
- NOTE: You can toggle on the “Advance Window, which will specify the time frame the wait period actually counts (i.e., Monday-Friday, 9 am-5 pm). If you have a time delay set for 10 minutes, and someone enters the step on a Saturday, but you have a window set for Monday-Friday 9 am-5 pm, the time will start at 9am on Monday.

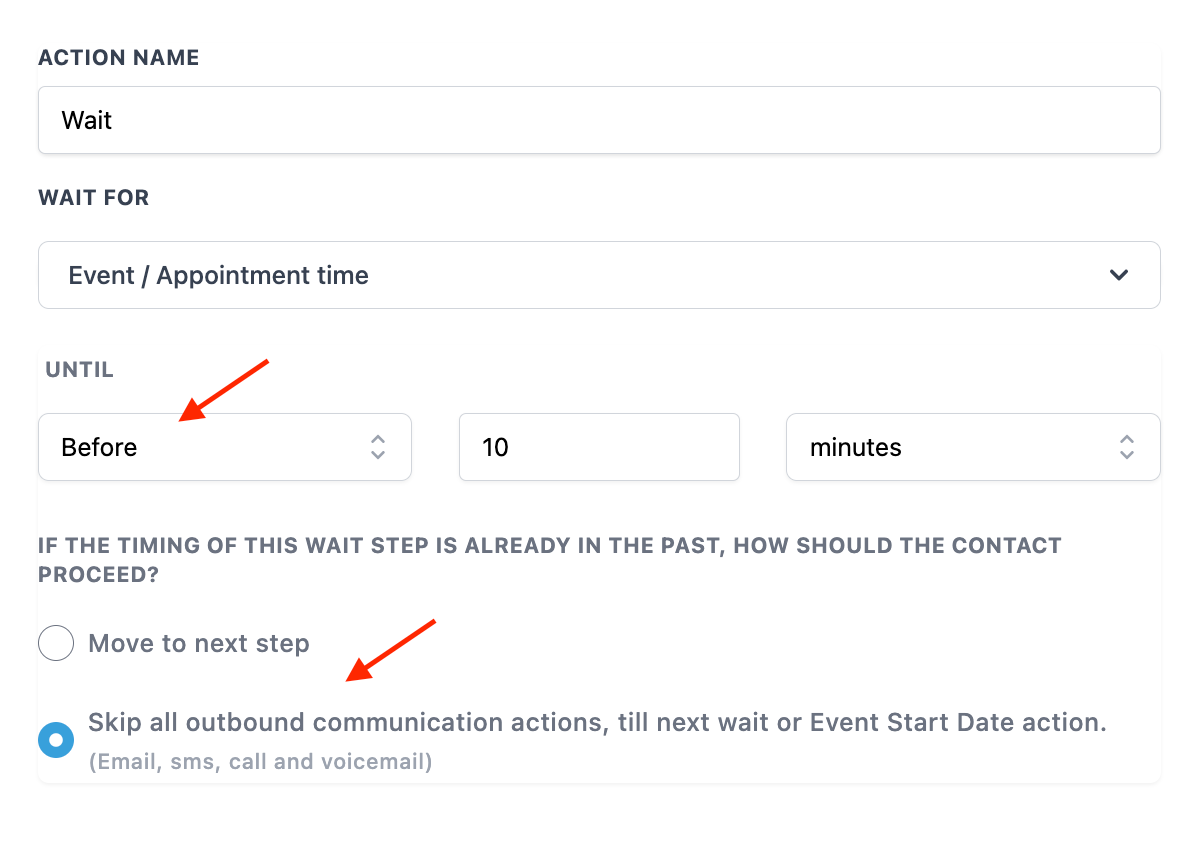
- Event/Appointment time: waits until before, after, or the exact time of the event/appointment time
- Choose before or after, and the timeframe.
- You can move the Contact to the next step or skip communications
- Condition: waits for a specific condition to be met (such as a tag being added) - you can customize filters for this to specify your exact condition
- Choose one or more “segments” (condition), and toggle on the timeout if you want to add that feature.

Note: “Time Out” feature works best with conditions like “Customer Replied.” If the lead did not reply, they will keep waiting at this step. If you want to move this lead forward, you can set up the “Time out” feature to a certain number of days so that the lead can move to the next step, whether they reply or not.
Also, When you select “Skip all outbound communication,” then all email, SMS, or call events between the 2 wait steps will be skipped until the next wait step.

- Contact reply: waits for a contact to reply to a communication
- Choose “reply to” in order to select the SMS/email event for the workflow.
- Toggle on the “timeout” setting if you want to add this feature.
Using the Wait action in the Workflow Builder allows you to hold Contacts before advancing to the next step of a Workflow. This can be useful for many reasons, from appointment bookings/reminders to follow-ups and more. Now, let’s take a look at how to set up a Wait event.
Step 1: Adding an Action to the Workflow
- Click into the Workflow and click the + icon to add an action
- Choose the Wait action from the list
Step 2: Under “Wait For” choose the type of Wait action you wish to use
There are several options for customizing the Wait action, categorized as Time-based or CRM events. Here’s a brief description of each type of Wait action you can setup:
- Time delay: waits for a set amount of time
- NOTE: You can toggle on the “Advance Window, which will specify the time frame the wait period actually counts (i.e., Monday-Friday, 9 am-5 pm). If you have a time delay set for 10 minutes, and someone enters the step on a Saturday, but you have a window set for Monday-Friday 9 am-5 pm, the time will start at 9am on Monday.
- Event/Appointment time: waits until before, after, or the exact time of the event/appointment time
- Choose before or after, and the timeframe.
- You can move the Contact to the next step or skip communications
- Condition: waits for a specific condition to be met (such as a tag being added) - you can customize filters for this to specify your exact condition
- Choose one or more “segments” (condition), and toggle on the timeout if you want to add that feature.
Note: “Time Out” feature works best with conditions like “Customer Replied.” If the lead did not reply, they will keep waiting at this step. If you want to move this lead forward, you can set up the “Time out” feature to a certain number of days so that the lead can move to the next step, whether they reply or not.
Also, When you select “Skip all outbound communication,” then all email, SMS, or call events between the 2 wait steps will be skipped until the next wait step.
- Contact reply: waits for a contact to reply to a communication
- Choose “reply to” in order to select the SMS/email event for the workflow.
- Toggle on the “timeout” setting if you want to add this feature.
Was this article helpful?
That’s Great!
Thank you for your feedback
Sorry! We couldn't be helpful
Thank you for your feedback
Feedback sent
We appreciate your effort and will try to fix the article