It’s important to understand the different options for how you may add somebody to your product or to your offer or to your membership area as a whole. Follow along to learn how you can use triggers and funnels to do so.
Part 1: Granting Access Using a Trigger
There are many different ways you can use triggers. The two-step order form trigger is a popular option. This will give the customer access to a membership once they complete the appropriate two-step order form in the funnel containing the membership product.
- Create a new trigger using the two-step order form.
- Add a funnel filter and select the funnel which will contain your membership product.
- NOTE: You can also add other filters if you need to further specify the use of this trigger.
- Add an action and select “membership grant offer”
- Select the specific offer you want to be included.
- NOTE: At this step, you will need to have created the membership. If you haven’t done so yet, pause and return once it is set up. (Check out our tutorials on memberships if you need help creating one.)
- Save and activate the trigger.
- The contact will now be able to access the membership.
- Once they are granted access, there are several different triggers for memberships specifically that you can use to better control and enhance their specific use of the membership area.

Using the “contact tag” trigger to fire off an action is another popular option for granting access to the membership. You can follow similar steps above but create the trigger so that when a specific tag is applied, the membership is granted. (Be sure to filter out the appropriate membership.)
Part 2: Granting Access Using a Funnel
Step 1: How to Give Access via a Funnel
- Navigate to your membership funnel.
- On the step that will allow the customer to purchase your membership, make sure that you have created the membership product.
- Go to the products menu.
- NOTE: You may have to create a new product if you have not done so yet.

- If you already have a membership product, click on edit and scroll down and see if the “membership offer” option has been enabled.
- Once that has been clicked, it will configure the product as a membership with whichever course you select.
- NOTE: At this step, you’ll have needed to create the membership. If you haven’t done so yet, pause and return once it is setup. (Check out our tutorials on memberships if you need help creating one.)
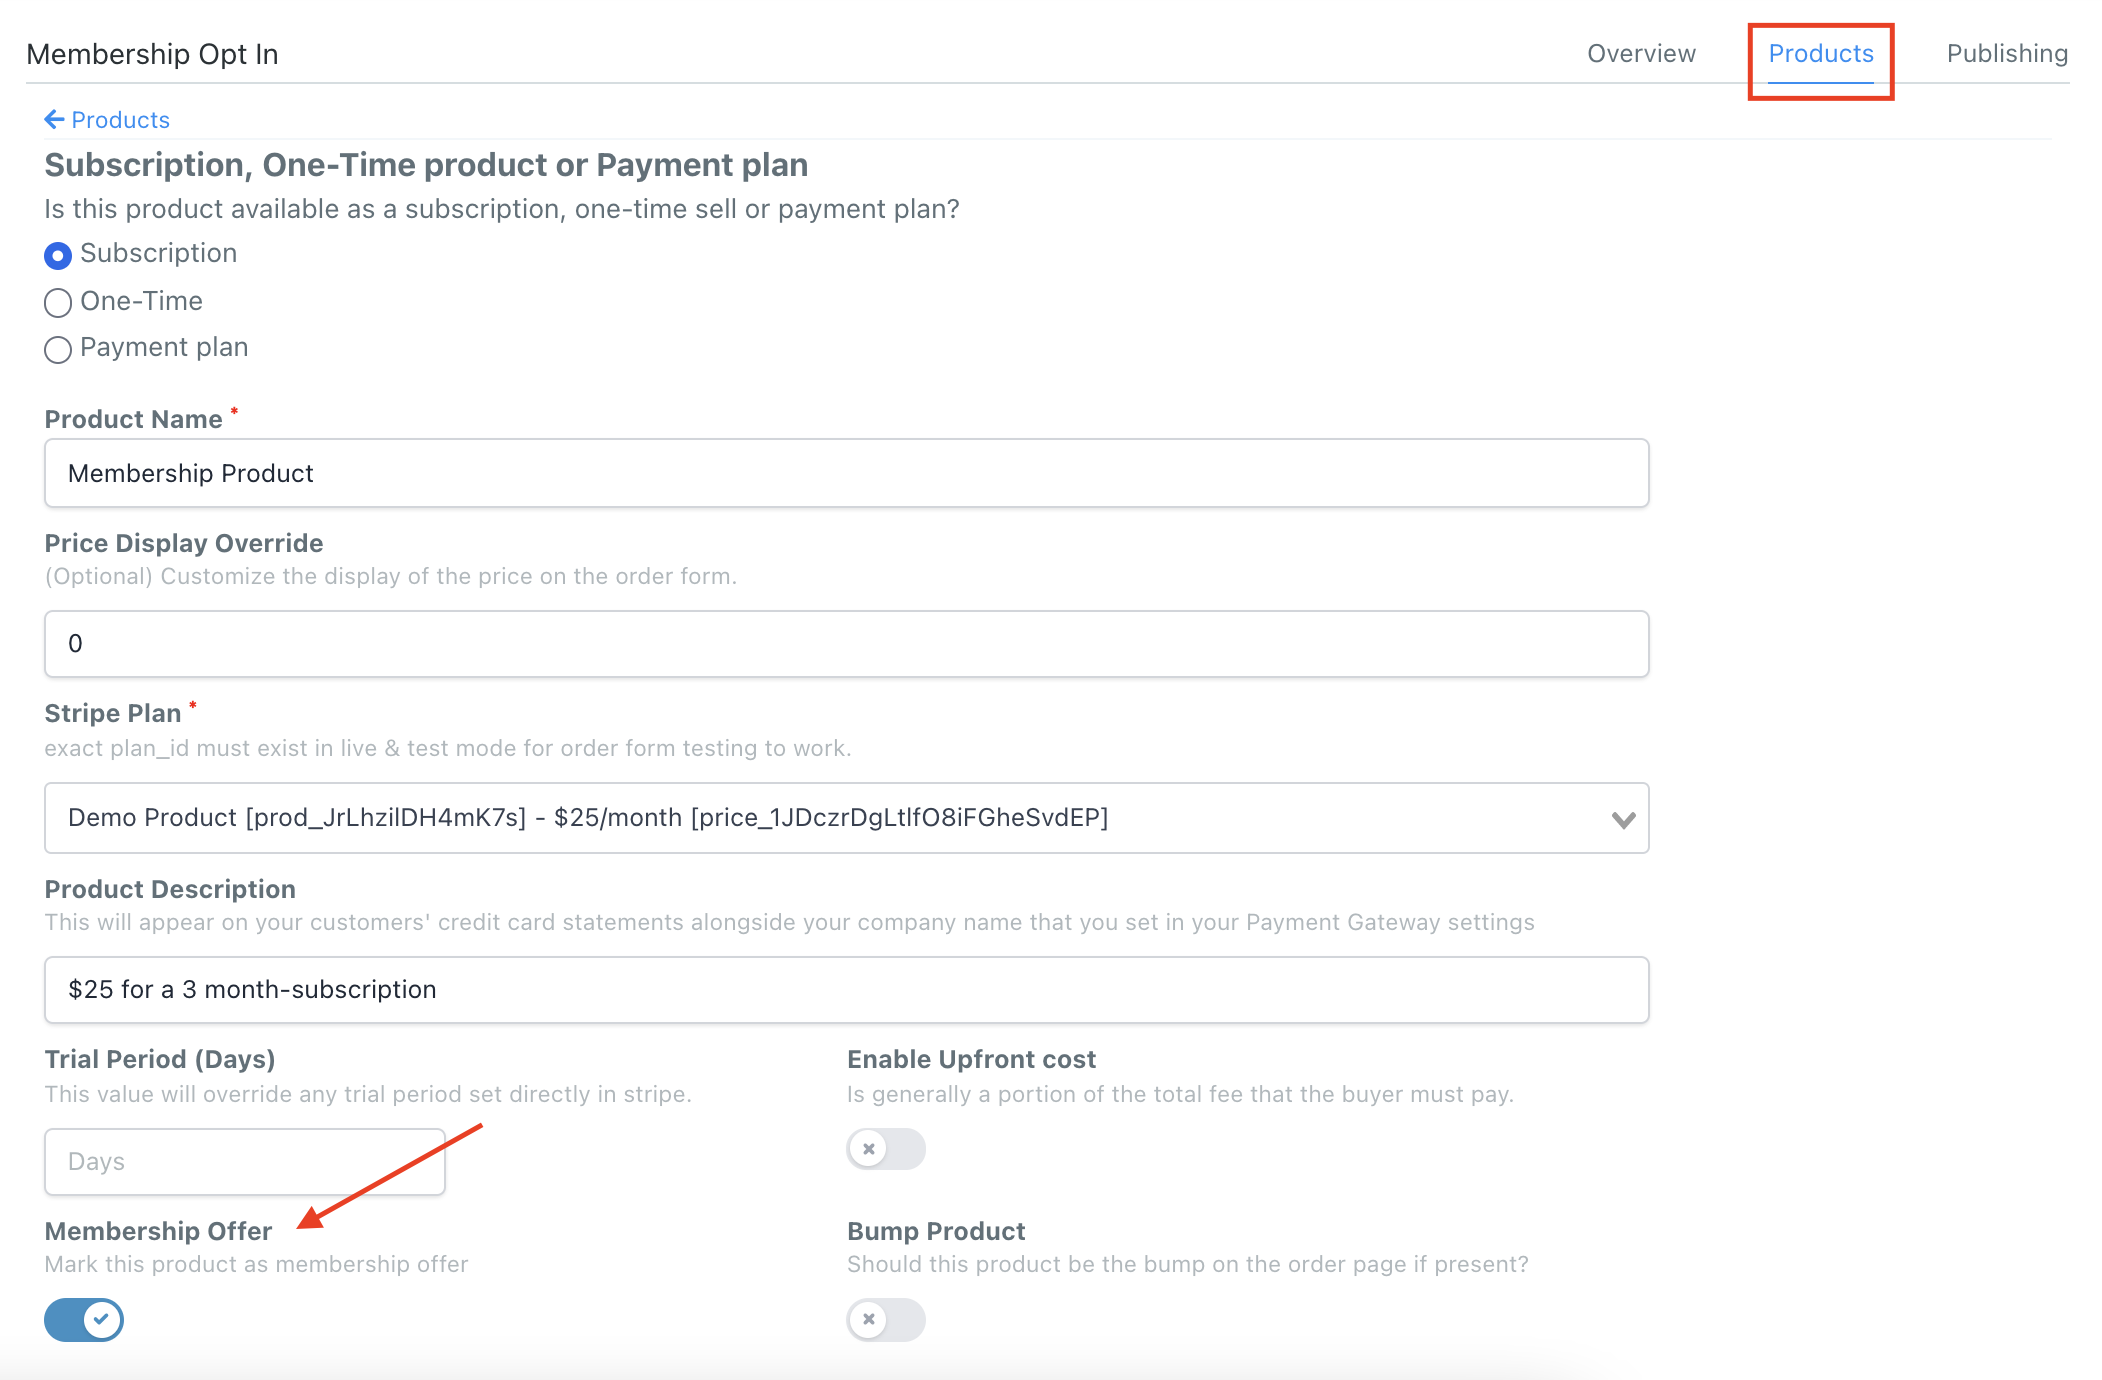
- Click Update to save and confirm these changes.
Step 2: Giving the customer access to the membership area in the same funnel after they make their purchase.
- Navigate back to the funnel overview and select or create a step following the purchase of the membership.
- Click Edit.
- In the editor, add a new button to the funnel. Then scroll down the button settings.
- Click on button actions and change it to “Go to membership”. This enables the button so customers will be directed to the membership area upon clicking.
- NOTE: It is common for customers to be sent their login information through a separate email once they’ve purchased a membership product. However, if you want them to get direct access right away, this option works too. (Check out our other tutorials on how to create and send welcome emails with login details.)
Part 3: Granting Access Using Workflows
Step 1: Start the Workflow with a Trigger.
- In this example, we’ll use a two step order form. Similarly with triggers, you can filter by a particular page, form, etc.

- Select the action “Membership Grant offer” and choose what offer to grant.


- Save the action.
- Save the Workflow.
- Switch from Draft > Publish mode for the Workflow to function.
Now you know some of the most common ways you can give customers access to your membership area or course.
Was this article helpful?
That’s Great!
Thank you for your feedback
Sorry! We couldn't be helpful
Thank you for your feedback
Feedback sent
We appreciate your effort and will try to fix the article