This tutorial will cover the duration in days filter for Contacts. This filter means an action will fire once every X number of days (you can customize any number of days for X.) For this tutorial, we will use 7. The actions in the Duration in Days Trigger will only be applied every 7 days for any contact that hits that day mark, or an exact multiple of it 7, 14, 21, 28 days ago, etc.)
You can do many things with the duration in days filter, customizing it for your business however you wish. Commonly it’s used to remove stale/old opportunities. For this use-case example, we’ll show you how to remove stale opportunities older than 7 days. In this example, you have two leads, John and Sally. John's last activity was 9 days ago, and Sally's was 7 days ago. This trigger will not fire for John because his last action was 9 days ago (Even though it's more than 7, it's not exactly 7). It will fire for Sally because her last activity was exactly 7 days ago. The trigger will continue to fire every 7 days, so John will eventually be caught in one of the multiples of 7 (since he’s currently at 9 days, he’ll get caught at the next multiple of 7 – 14 days.)
NOTE: The Stale Opportunities trigger will not fire retroactively but will fire on the multiple of the duration days. Part 2 below provides a solution for this.
Part 1: Create a Trigger for Filtering Opportunities based on Duration in Days
Step 1: Create a Trigger
- Navigate to Triggers > + Add Trigger
- For Part 1, the automation should be triggered by Stale Opportunities.
- Define the filters as shown in the screenshot below:
- In Pipeline - (Choose the Pipeline)
- Pipeline Stage - (Choose the Stage)
- Duration in Days - (Choose a duration; we’re using 7 for the example.)
- For Part 2, the action performed would be Remove Opportunity, and you’d select the specific Pipeline.
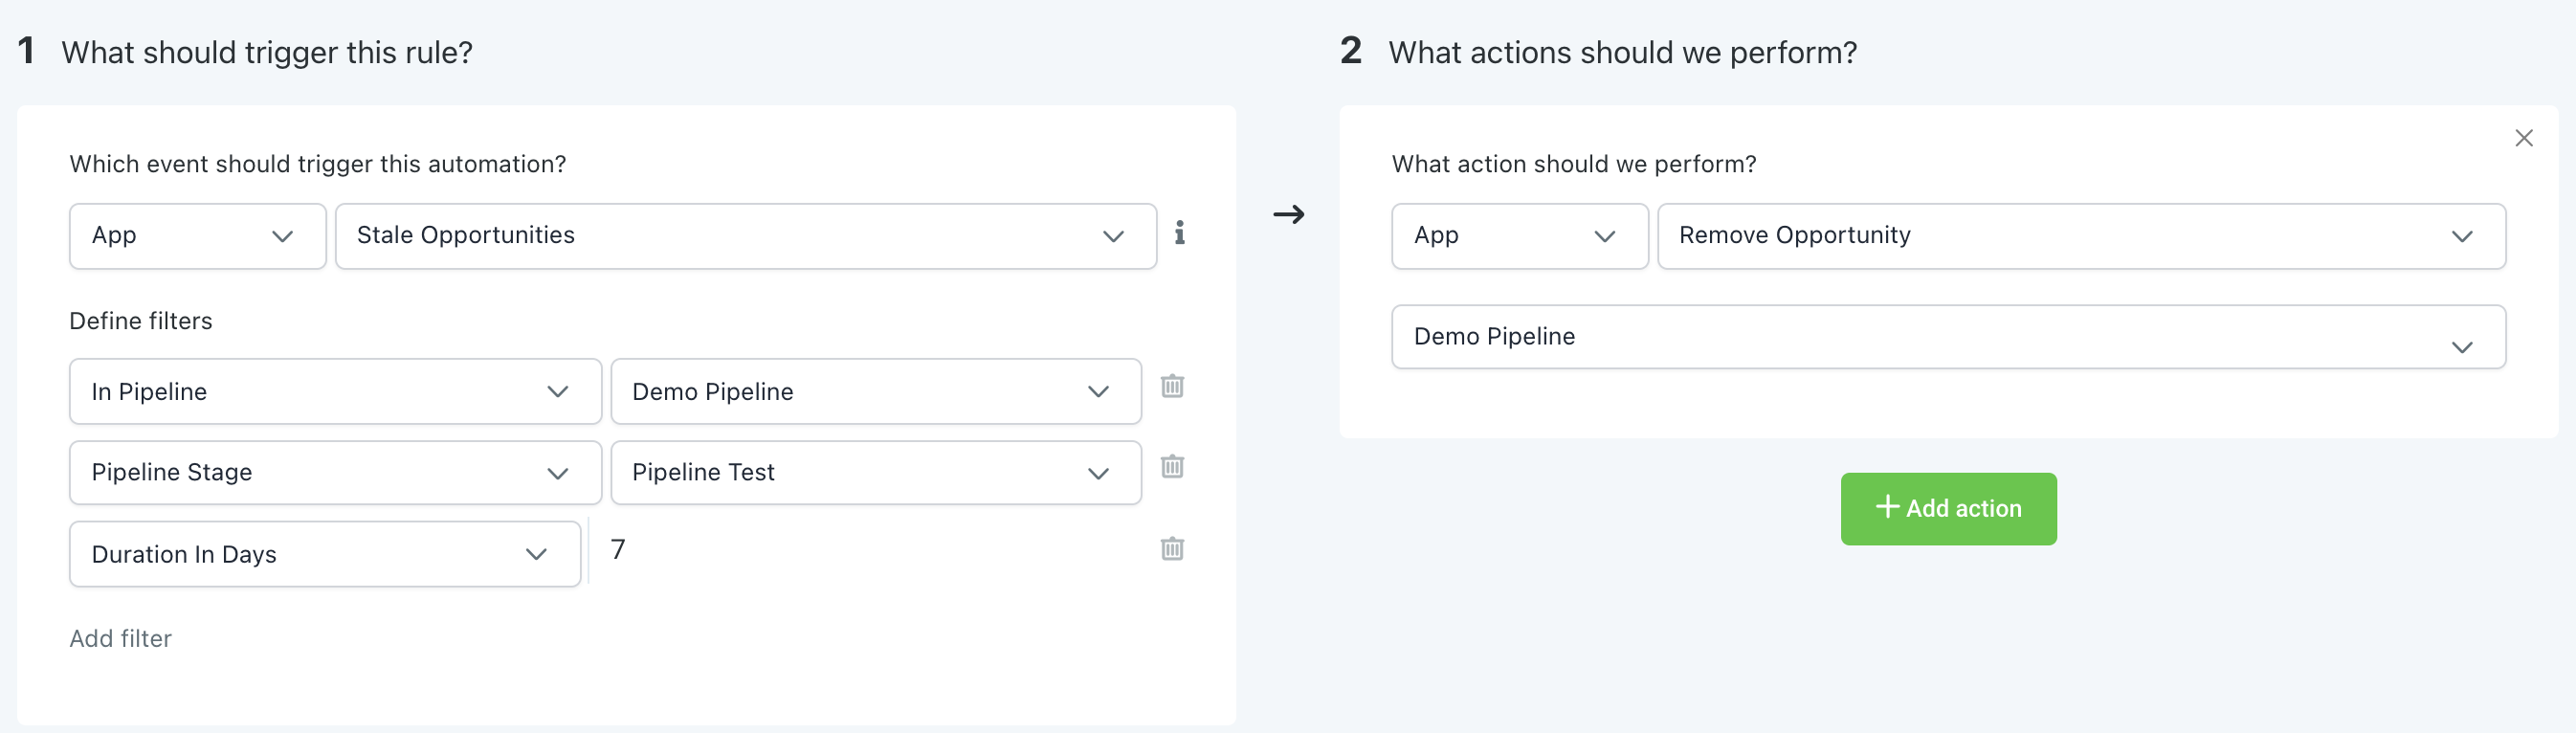
- You can add any additional actions you wish under + Add Action (such as adding/removing a tag, sending yourself a notification, etc.)
- Save and Activate the Trigger.
Part 2: A Workaround For Retroactive Application Since the system won’t retroactively apply the trigger, this will allow you to ‘clean up’ any old Contacts that are in the system and considered an old opportunity before the trigger in Part 1 was created.
Step 1: Create a Tag
- Navigate to Settings > Tags.
- Name this anything you’d like, such as “stale opp” or “stale opportunity”.
Step 2: Create a Trigger Using the Tag
- Navigate to Triggers > + Add Trigger
- For Part 1, the automation should be triggered by a Contact Tag.
- Define the filter as “Tag Added” and choose the tag you created in Step 1.
- For Part 2, the action performed would be Remove Opportunity, and you’d select the specific Opportunity.
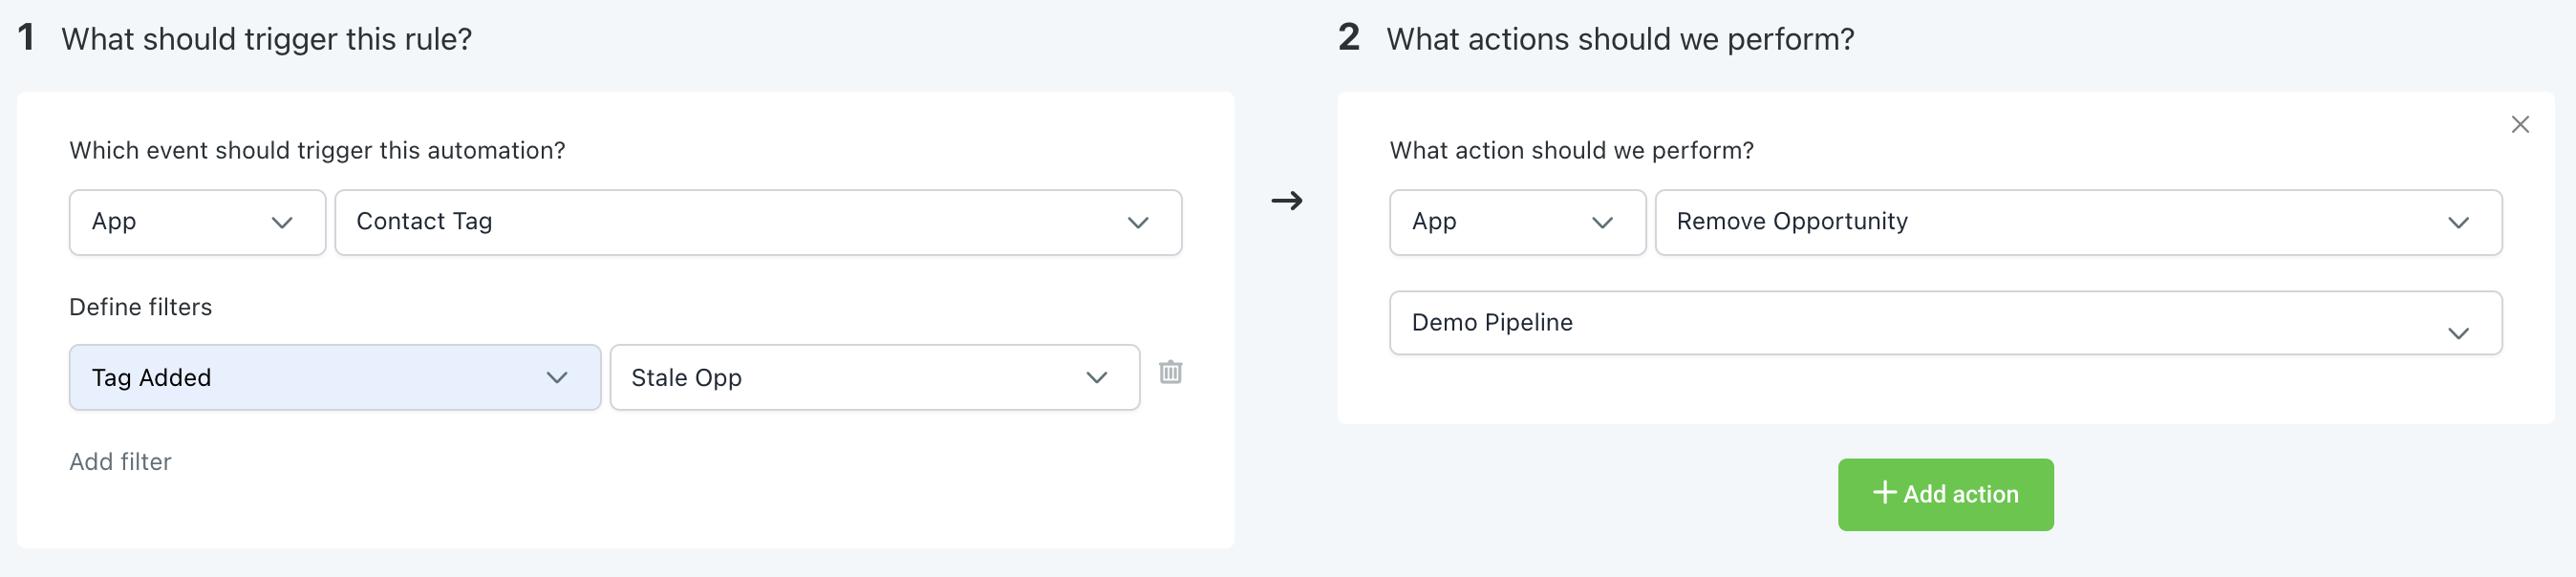
- Save and Activate the trigger for it to run.
Step 3: Create a Contact Filter
- Navigate to Contacts/Smart Lists
- Click “More Filters” to add a filter.
- The first filter should be to filter the pipeline and pipeline stage, selecting from the dropdown.
- The second will be “last activity more than 7 days ago”.
- Once you have your contacts filtered out, you can select them and then click “add tag” from the bulk actions buttons at the top of the page. Assign the tag you created in Step 1. This will fire the trigger to remove all of these contacts from your pipeline stage.
Was this article helpful?
That’s Great!
Thank you for your feedback
Sorry! We couldn't be helpful
Thank you for your feedback
Feedback sent
We appreciate your effort and will try to fix the article